


 Guest |
 MyWebMail
Read and Manage your Mail
Step. I. Login to your webmail. When you first login, your inbox is automatically displayed. Bold messages (1) are new or unread. Messages you have already looked at will be in un-bolded text(2). To view a different folder, just click on the name of the folder (3)you want to view. The options for each folder work the same as your inbox.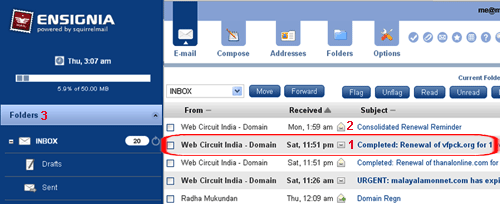
Step. II. Let's go through what each of the buttons will do:
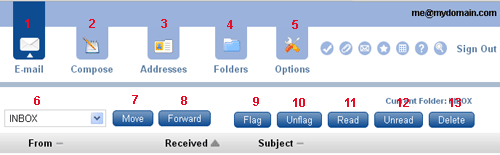
- E-Mail - This button will download any new messages received. This happens automatically each time you log in, click on the inbox link or explicitly click on this button.
- Compose - This is the button you would click on to compose, write, or send a new email. When you click on this button, you will be sent to a new page to type out your email, subject, senders etc.
- Addresses - To view, edit and add addresses to address book.
- Folders - To view, create and delete Folders. You can store messages in different folders. This is especially useful if you have a lot of email and want to keep it organized. The folders option allows manipulation of your folders.
- Options - . Depending on the configuration, you may have several choices of themes, languages, folders, and other preferences. All of these may be changed without affecting any other users on the system.
- List Box - For Selecting Inbox, Draft , Trash etc directly from the existing page.
- Move - Select Messages You Wish to Move. Click the check box next to each message that you wish to move to a folder then Click the "Move Selected To:" Box and Select the Destination Folder.
- Forward - This will forward the selected message, and direct you to the composition page to enter your recipient.
- Flag - This button will gives you the option to mark an email or multiple emails as Flagged
- Unflag - This button will gives you the option to mark an email or multiple emails as Unflagged.
- Read - This button will gives you the option to mark an email or multiple emails as Read.
- Unread - This button will gives you the option to mark an email or multiple emails as Unread.
- Delete - Clicking on this button will delete the selected/current message and move it to the trash folder. If you wish to permanently delete a message you will have to either Empty the trash folder or select the message explicitly and delete it.
- Sign Out - Sign out from the webmail current session.
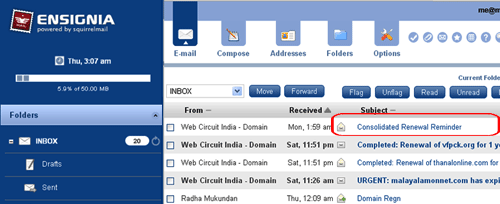
Step. III. To view an email, click on the subject (1). The selected email will be highlighted and the entire message will get loaded on a new screen.
Step. IV. Let's go through what each of the buttons will do:
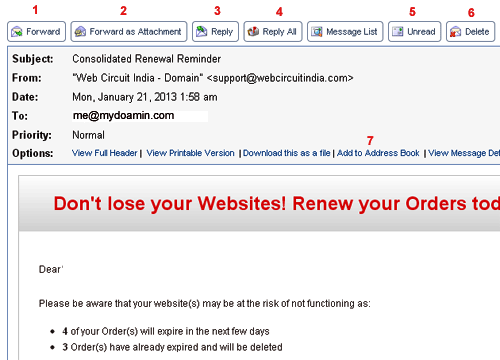
- Forward - This will forward the selected message, and direct you to the composition page to enter your recipient.
- Forward as attachment- This will forward the message as attachment.
- Reply - This is the reply button. It will automatically set up the composition page with the information necessary to reply to the sender of the selected message.
- Reply All - This is just like the reply button, but it's used when the selected email is addressed to more the one person and you want to reply to everyone, not just the person who sent the message.
- Unread - This button will gives you the option to mark the email as Unread.
- Delete - Clicking on this button will delete the selected/current message and move it to the trash folder. If you wish to permanently delete a message you will have to either Empty the trash folder or select the message
- Add to Address Book - Click this button to add the senders ID to our address book.
Related articles