


 Guest |
 Web Mail (Premium)
Manage identities
Step. I. Login to the webmail interface, At the top of the page, click on Settings.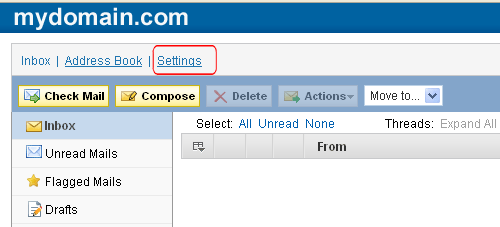
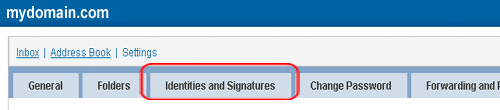
Step. II. On the settings page, Click the Managing Identities and Signatures tab.
Step. III. To add a new Identity: Click on the 'Create New Identity button'.

Step. IV. Enter fileds as given below
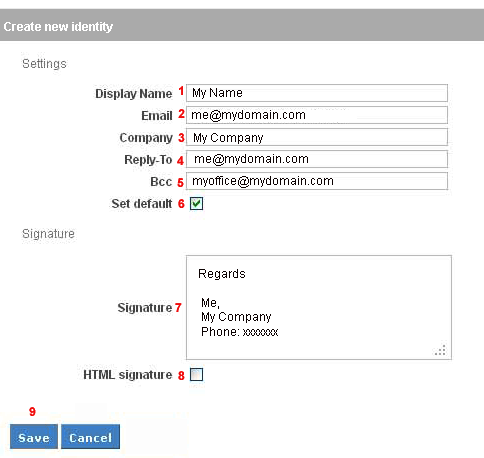
- Display Name (compulsory) - This is the from name that a recipient will see in his inbox.
- E-Mail (compulsory) - This is the from email address that a recipient will see in his inbox.
- Company/Organization - Enter an organization name, if any.
- Reply To Pre filled Reply To email address
- Bcc Pre filled Bcc email addresses on the email composition page.
- Set as Default - Any created identity can be set as the default id
- Signature - Email signatures can be created here in plain/rich text format. If you wish to add a signature in Rich Text, select the HTML signature option.
- HTML Signature- Email signatures can be created here in plain/rich text format. If you wish to add a signature in Rich Text, select the HTML signature option.
- Save - Save the settings.
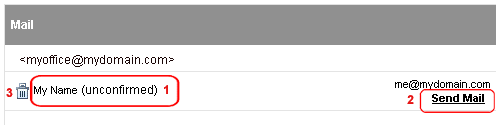
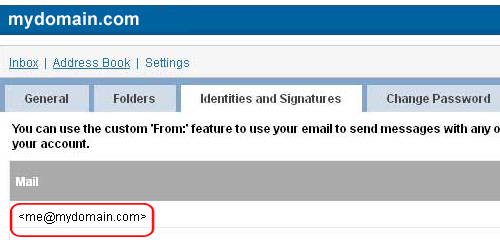
Step. V. Now the new identity appears as 'Unconfirmed' (1). To prevent this feature from being used for malicious purposes like email spoofing, it is necessary for any identity to be registered before it can be used for sending email. Thus, when you add a new identity, a verification email is sent to that address. Only when the verification is completed, can a new identity be used to send email. For this click on 'Send Mail' (2) link. You can delete the new identity by clicking on the 'trash' icon (3).
Step. VI. Modifications of the identities: Click on the identity.
Step. VII. 'Edit item' page appears. Let us see the fileds and buttons of this form
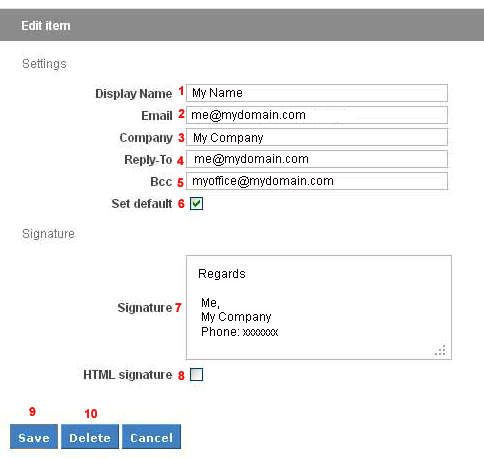
- Display Name (compulsory) - This is the from name that a recipient will see in his inbox.
- E-Mail (compulsory) - This is the from email address that a recipient will see in his inbox.
- Company/Organization - Enter an organization name, if any.
- Reply To Pre filled Reply To email address
- Bcc Pre filled Bcc email addresses on the email composition page.
- Set as Default - Any created identity can be set as the default id
- Signature - Email signatures can be created here in plain/rich text format. If you wish to add a signature in Rich Text, select the HTML signature option.
- HTML Signature- Email signatures can be created here in plain/rich text format. If you wish to add a signature in Rich Text, select the HTML signature option.
- Save - Save the settings.
- Delete - Click here to Delete an Identity.
Related articles
 Your email account has the ability to configure multiple identities for sending email, through the Webmail interface. This feature lets you have different email addresses that get populated on an email composition page when
you are sending/forwarding/replying to email. Also, the same identity can be registered by multiple email accounts.
Your email account has the ability to configure multiple identities for sending email, through the Webmail interface. This feature lets you have different email addresses that get populated on an email composition page when
you are sending/forwarding/replying to email. Also, the same identity can be registered by multiple email accounts. A new Identity does not create a new email account or increase your email space.