


 Guest |
 Google Apps
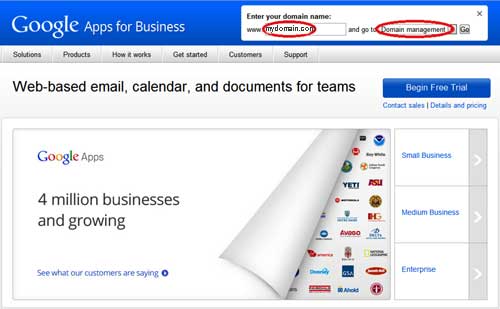
By: Team (Support) Posted on: February 12, 2012Step.1. Go to Google Apps page (http://www.google.com/apps/intl/en/business/index.html), and enter your domain name and select go to "Domain management", and press "Go" button.
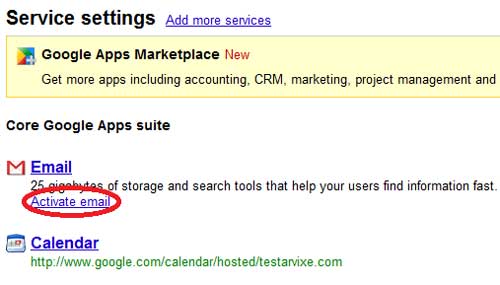
Step. 2. Under Service Settings, click on Activate email
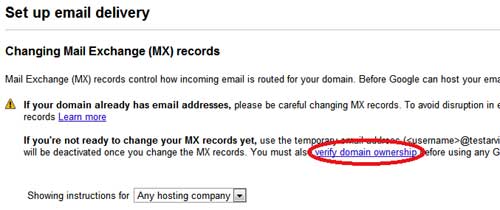
Step.3. Click on "verify domain ownership" (you may have already verified your domain ownership when setting up your GoogleApps account, but this form of verification will make it easier to configure your GoogleApps for mail), then Click on the Continue button
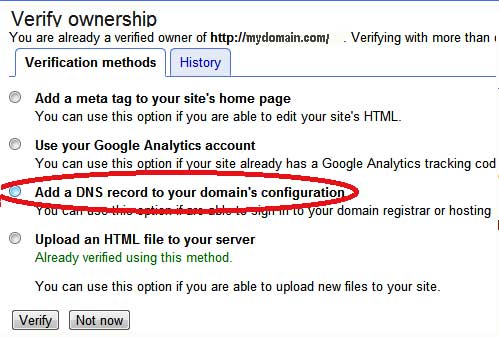
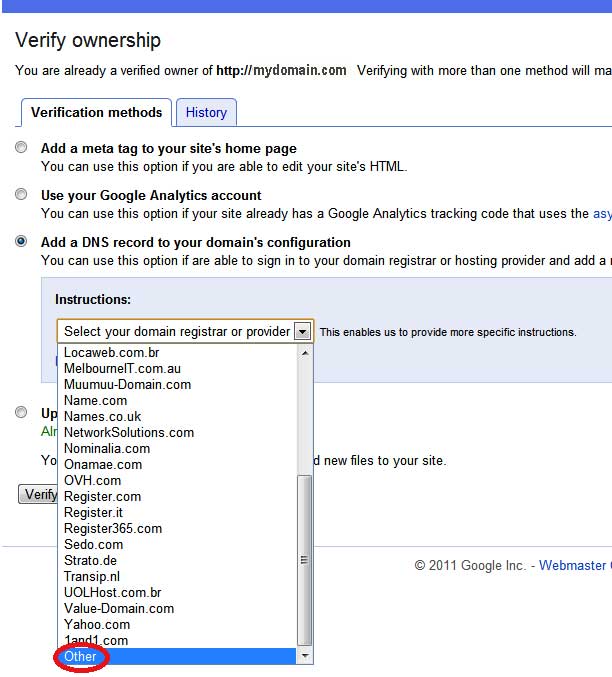
Step.4. Click on Add a DNS record to your domains configuration
Step.5. From the drop down bar, select Other
Step.6. Copy and paste the text code (on the GoogleApps page) and paste into relevant area of the hosting control panel.
Step.7. Click the Verify button in Google Apps page. After you receive a confirmation, you may close this page.

A Technical blog for Website Owner's
Categories
- Browsers (5)
- Domain (5)
- Email (7)
- Hosting (3)
- Internet (1)
- Localhost (18)
- Miscellaneous (2)
- Offers (2)
- Web Design (4)