


 Guest |
 MyWebMail
Manage the Calendar
Step. I. Login to the webmail interface, At the top of the page, click on the 'Calendar' icon.
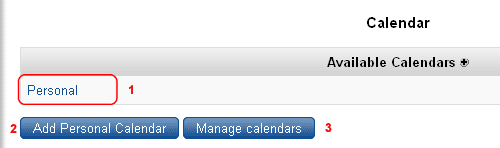
Step. II. 'Available Calendar' page appears. Here you can see the existing calendars (1) and a provision for adding a new calendar by clicking on the 'Add a Personal Calendar'. You can mange the existing calendar by clicking on the 'Manage Calendars' (3). Now click on the 'Add a Personal Calendar' (2).
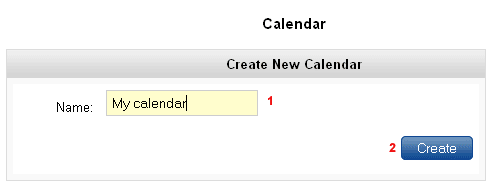
Step. III. 'Create New Calendar' page appears. Enter the new calendar name in the 'Name' text box (1) and Click on 'Create' button(2).
Step. IV. 'New Calendar' page appears. The calendar gives you two views daily and monthly. Month View is the default view in Calendar.
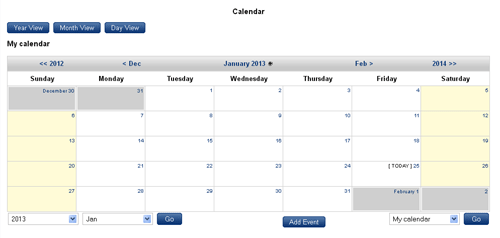
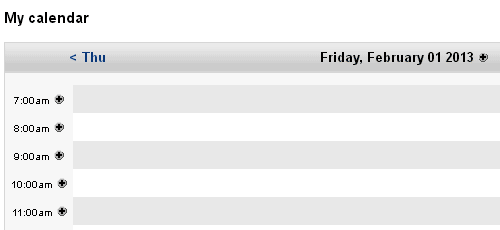
Step. V. Click on the Day View link to see the day view.
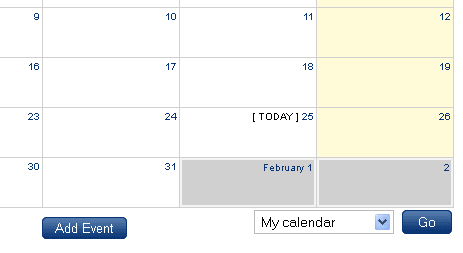
Step. VI. To add a new event, Click on 'Add Event' Button.
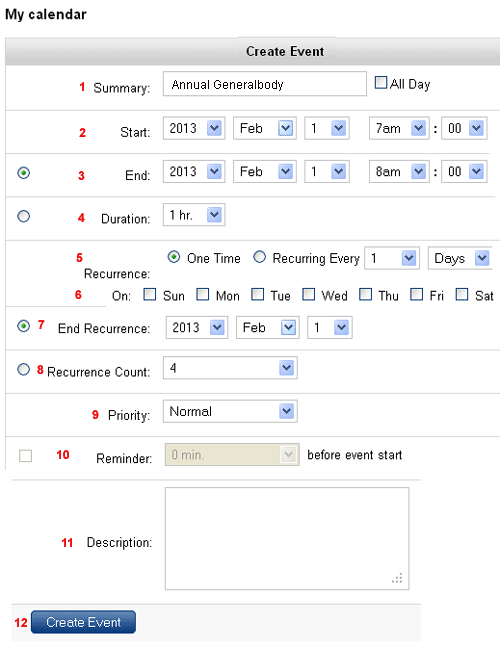
Step. VII. 'Create Event Page appears'. Type a title for the appointment in the Summary (1) text box. Select 'Start' (2) and 'End' time (3) or Duration (4) of the event. You can set the 'Recurrence' as 'One time' or 'Recurring every day' by selecting the appropriate radio buttons (5). Select the check boxes (6) for selecting which days of a week for this recurring event. You can specify either 'End Recurrence' (7) to a specific day or as 'Recurrence Count' (8). Use the drop down menu to set the priority (9) of the appointment to Normal or High. You can enable 'Reminder' before event start(10). Type the notes regarding this event in 'Description' (11) box.. Finally click on 'Create Event' button (12).
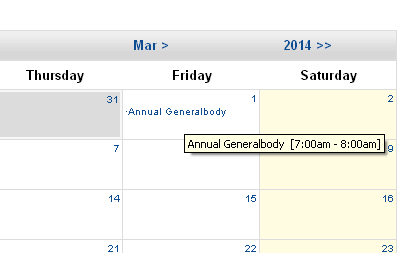
Step. VIII. Now the event is added to the calendar.
Related articles