


 Guest |
 WebsitePanel
Create E-mail account
Step.1. Login to your hosting control panel and Click on 'Mail' icon. Select 'Accounts' from the popup menu.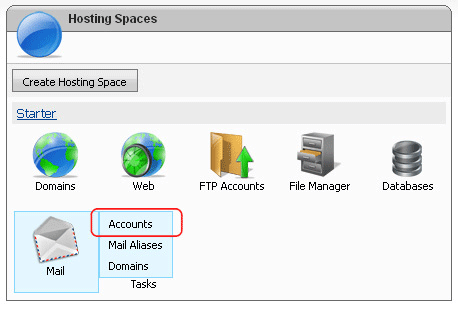
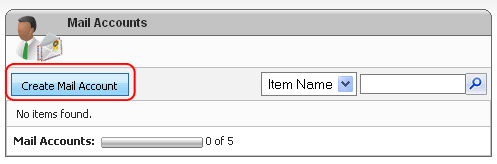
Step.2. 'Mail Accounts' page appears. Click on the "Create Mail Account" button
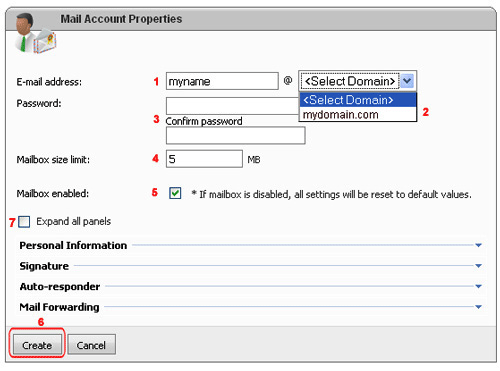
Step.3. 'Mail Account properties' page appears. Enter the desired e-mail ID (1) and Select the domain (2). Provide the password and confirm it in the second text box (3). You can give the Mail box size (4) depends up on the size limits of your plan. Select the 'Mailbox Enabled' check box (5). If you have to add signature, auto-responder etc then click on 'Expand all panels' (7) check box and proceed as in the tutorial ' Setting Personal Info, Signature and Auto-responseder for a mail account'. Finally click on the 'Create' (6) button.
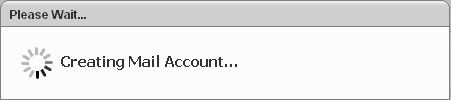
Step.4. Creating Mail account message appears on the screen. Wait for few minutes.
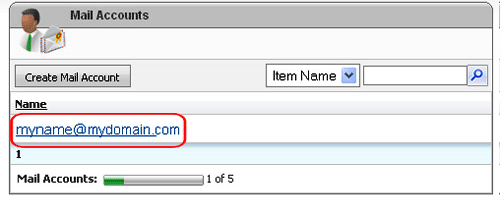
Step.5.'Now the Mail Accounts' page is updated with the new e-mail ID.
Related articles