


 Guest |
 Setup WAMP on Windows
By: Team (Support) Posted on: March 1, 2008Download WAMP server from download section of this website. You will have the option to choose wither a 32 or 64-bit environment depending upon your computers configuration. This server pack includes Apache, PHP, MySQL, phpMyAdmin and SQLBuddy.
Click on the downloaded WAMP server file for installation.
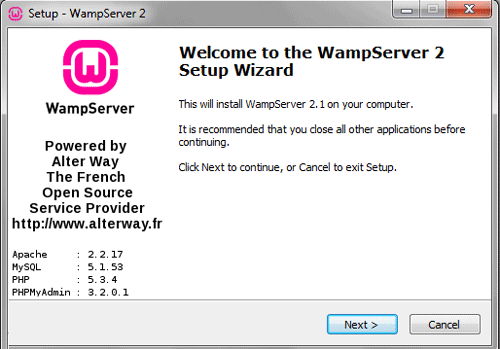
Setup wizards starts, Click on the "Next" button
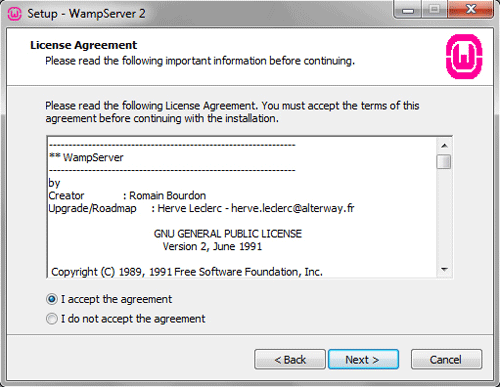
You have to agree the license of WampServer now. Select "I accept the agreement" radio button and then click "Next" button
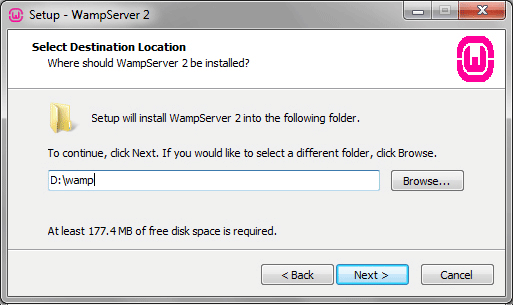
Select the destination location. You can select any drive to Install the WAMP server. Click "Next" button.
"Select Additional Tasks" dialog appears on the screen. Here you can select the Create a Desktop icon or Quick Launch Icon or both as you like. Click "Next"

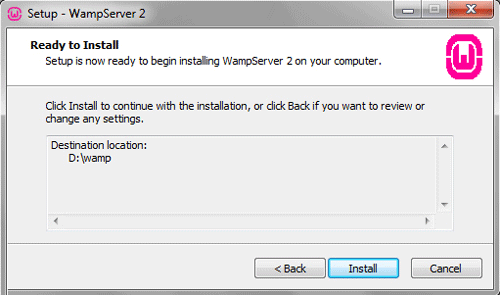
Setup is now ready to begin installing WampServer on your computer. Click on "Install button" to start installation.
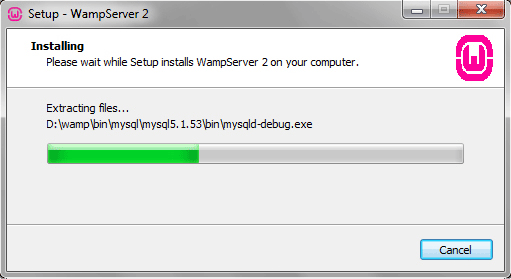
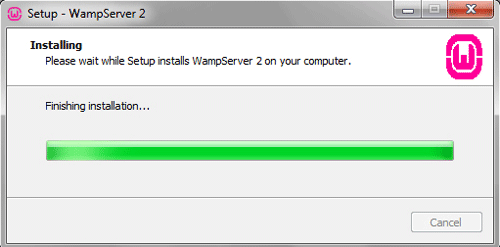
Wait till the installation to complete
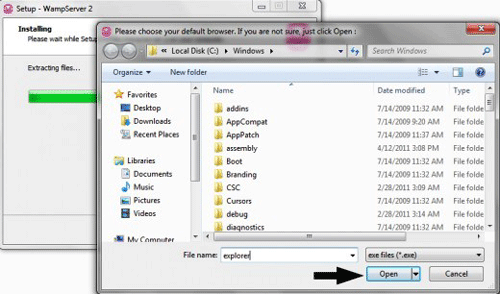
You will receive a dialog for choosing your default browser for WampServer. You can select any browser as your choice or cancel for default selection.(WAMP server select Internet Explorerby default)
WampServer installation has completed now and setup will guide you for Apache configurations in the next steps.
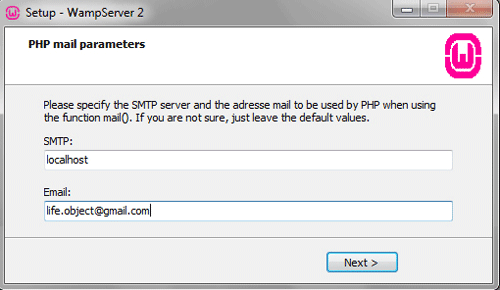
"PHP mail parameters" dialog box appears on the screen, here you can give your SMTP server configuration as "localhost" and your e-mail id in Email text box. Click Next.
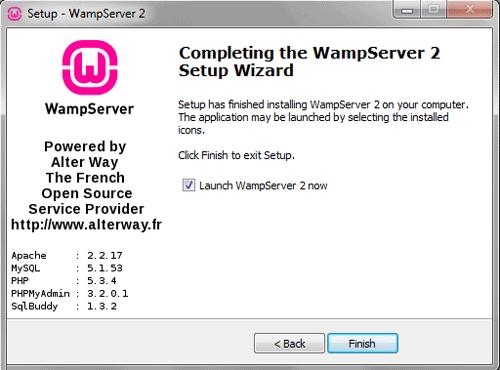
WAMP is now installed on your local computer.Click Finish to start WampServer along with other services.
Now you can see WampServer icon on the taskbar. WampServer icon has three states.
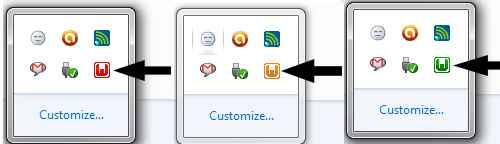
- Red : WampServer is Offline and no service has been started yet
- Yellow : WampServer is still Offline and any service among Apache, PHP and MySql has been failed to start.
- Green:WampServer is working normal along with all services and your development server is ready to use.
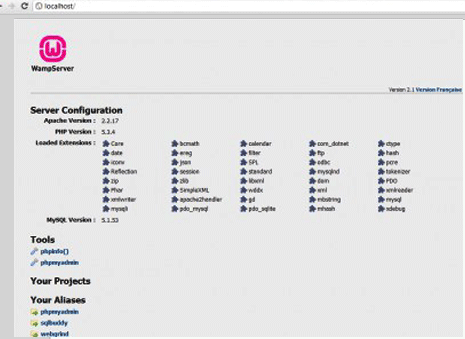
Now we have to test the WAMP Server, for that type http://localhost/ in your web browser. You can read Server Configuration at WampServer welcome screen.
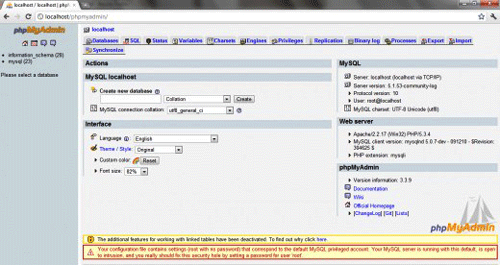
The last step is to access the phpMyAdmin. To start PhpMyadmin either click on phpmyadmin link on WampServer welcome screen or type http://localhost/phpmyadmin/ in the browser address bar.
Note: In order to change the password you will need to navigate to your phpMyAdmin file, located at D:/wamp/apps/phpmyadmin3.x.x and open the config.inc.php file with notepad. ( here D is drive letter). Once opended navigate to the lines that read,
-
$cfg['Servers'][$i]['user'] = 'root';
$cfg['Servers'][$i]['password'] = 'xxxxx';
$cfg['Servers'][$i]['AllowNoPassword'] = true;
A Technical blog for Website Owner's
Categories
- Browsers (5)
- Domain (5)
- Email (7)
- Hosting (3)
- Internet (1)
- Localhost (18)
- Miscellaneous (2)
- Offers (2)
- Web Design (4)