


 Guest |
 Setting IIS Server Permissions
By: Team (Support) Posted on: July 2, 2012If you have to write data or upload to a folder in the server then you will need to check the permissions on the IIS Server. Usually you have to give write as well as read permissions on the directory and files you wish to write too.
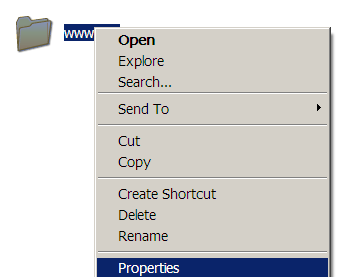
To check or change the permissions on the server go to Windows Explorer and Right click on the directory containing the database or text file. Click on 'Properties'.
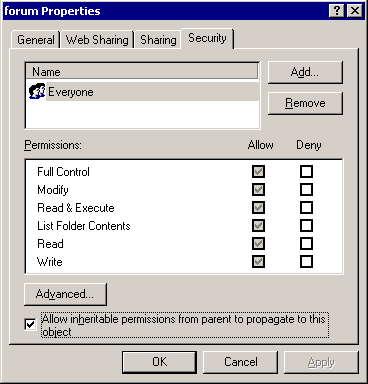
Choose the 'Security' tab form the dialog box window. Uncheck 'Allow inheritable permissions from parent to propagate to this object', from the bottom of the dialog box. Then click on the 'Add' button at the top left of the window.
Now 'Select Users or Groups' dialog box will open, highlight 'IUSR_MyComputer' account from the list by clicking on it. Where 'MyComputer' is this will be the name of your computer. 'IUSER' is the Internet Guest Account setup by default when IIS is installed on the system.
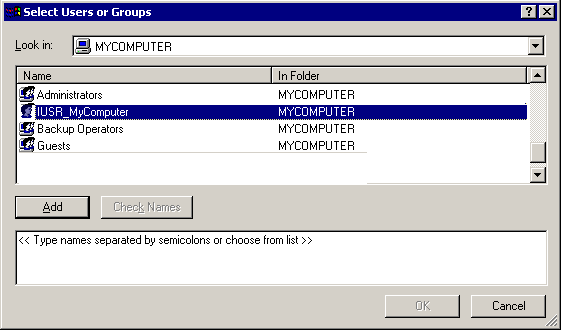
Click on the 'Add' button in the middle left of the dialog box. Now you can see MyComputer\IUSER_MyComputer' appear in the box in the bottom half of the dialog box. click on the 'OK' button at the bottom right of the 'Select Users or Groups' dialog box.
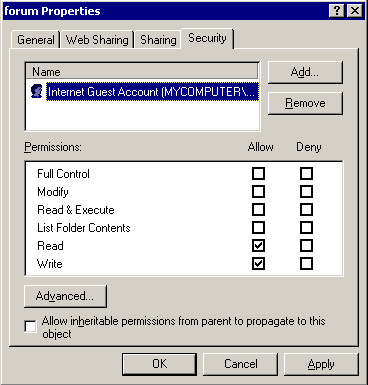
Highlight the 'Internet Guest Account (MyComputer\IUSER_MyComputer)' by clicking on it in the top box, Select 'Read' and 'Write' permissions for this account by checking the boxes at the bottom of the window
A Technical blog for Website Owner's
Categories
- Browsers (5)
- Domain (5)
- Email (7)
- Hosting (3)
- Internet (1)
- Localhost (18)
- Miscellaneous (2)
- Offers (2)
- Web Design (4)