WebsitePanel
Backup your website using WebSite Panel
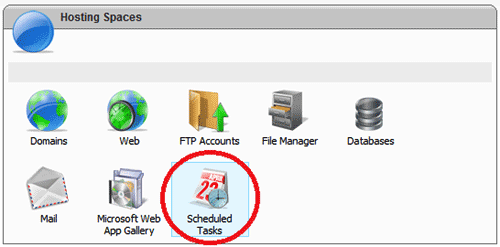
This tutorial will give you a step by step instruction on how to schedule automatic backups of your website from your WebsitePanel.Step.1. Login to WebsitePanel and Click Scheduled Tasks

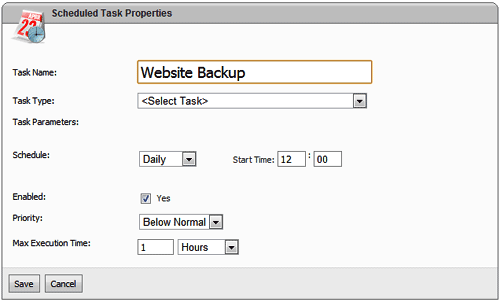
Step.2. Click Add Scheduled Task

Step.3. In the Task Name box, enter a task name for the backup.

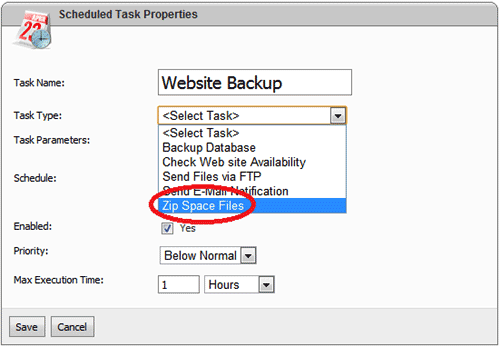
Step.4. In the Task Type drop down bar, select Zip Space Files

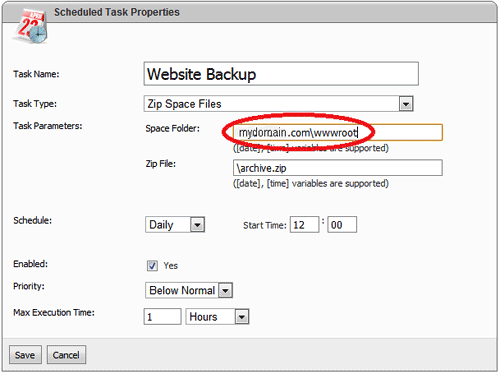
Step.5. In the Space Folder box, specify the folder that you would like backed up. For example: MyDomain.com\wwwroot

-
In the Zip File box, enter a name for your backup file. If you include [date] or [time] in the file name, a date/time string will be added to the file name.
So the Zip file box will be \[date]archieve.zip
Schedule: Select if you want your backups to run Daily, Weekly, Monthly, Once, or in Intervals from the drop down bar.
Enabled:Select
Priority: Below Normal
Max Execution Time: 1 hours
Click "Save" Button

Note: Every time a backup is taken, the zip file will be placed in the c:\hostingspaces\YourAccountName folder of your file directory. After the backup is taken, remember to download the zip files and remove the old zip files
Related articles


 Guest |