


 Guest |
 WebsitePanel
Configure GoogleApps for Mail Using WebsitePanel
Step. 1. Sign into your WebSitePanel and Click on the 'Domains' icon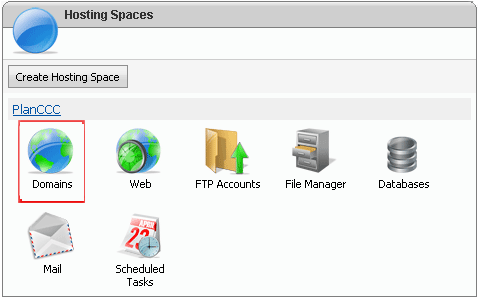
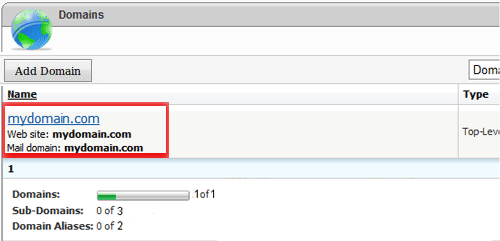
Step. 2. 'Domains' page appears. Click on the domain name
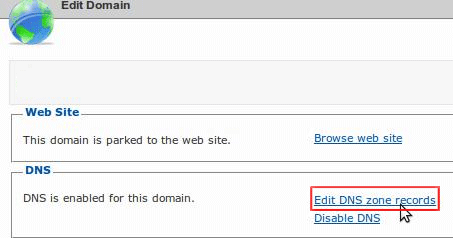
Step. 3. 'Edit Domains' page appears. Click on 'Edit DNS zone records' link
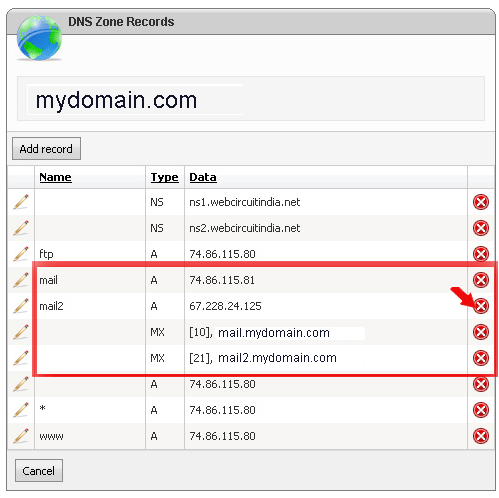
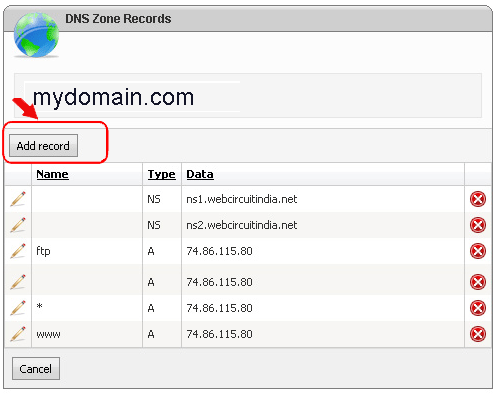
Step. 4. 'DNS Zone Records' page appears. Delete the Mail records (A and MX) by clicking the Red X to the right on the respective row
Step. 5. Click on 'Add Record' button
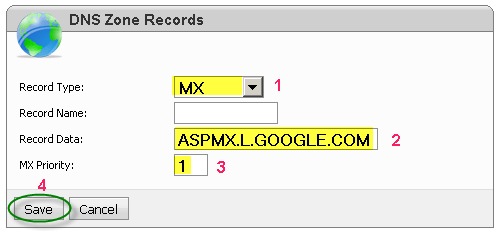
Step. 6. Pick MX (1) from the drop-down box, enter the record in the Record Data field (2) and enter the priority in the MX Priority field (3) and finally Click on Save Button (4). Repeat this step for all the MX records that Google provide in the aforementioned link.
Note: Dont enter the . (period) at the end of each record (as Google says, since our DNS doesnt need it.
Step. 7. Click on 'Add Record' button and Pick CNAME(1) from the drop-down box, type mail in the Record Name field (2) and ghs.google.com in the Record Data field (3) and finally Click on Save Button (4).
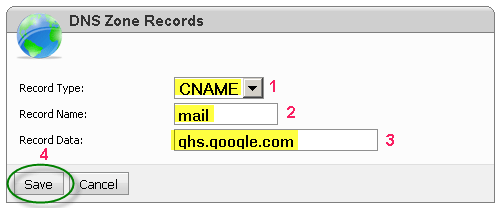
Note: You can now also add docs, sites and calendar CNAMEs as well
Step. 8. Google recommends that you add the following SPF record to your DNS zone. Click Add record, pick TXT from the drop-down box, copy/paste the record into the Record Data field

Step. 8b. At the end, you should have something like

Related articles
- Accessing DNS records using Website Panel
- My modifications in DNS setting via control panel is not reflecting in Internet. Why?