


 Guest |
 Optimizing images for web
By: Team (Support) Posted on: September 10, 2008We have noticed that many of our site owner's havent optimize their images properly, which results in extremely slow loading time and excessive use of allotted bandwidth. When you intend to publish your images online, you have to compromise the quality for obtaining proper size reduction. This technique is known as image compression.
There are two kinds of image compression, lossy and lossless.
Lossy compression means once you decompress the compressed data, you will not get the exact same image as the original. However, this will only be visible at a closer look. Lossy compression is good for web, because images use small amount of memory, but can be sufficiently like the original image. JPG format is loosy while GIF and PNG are lossless. For better size reduction you have to use RGB color mode and 72dpi resolution for your web images.
Images for web by Photoshop
Open an image in PhotoshopClick on the menu "Image>Image Size
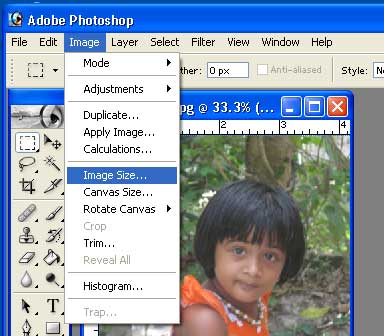
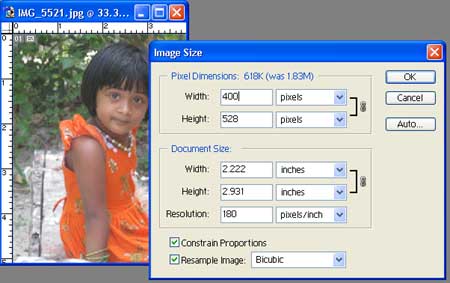
Enter a new width in the "Pixel Dimensions" box
Open the Save for Web Tool
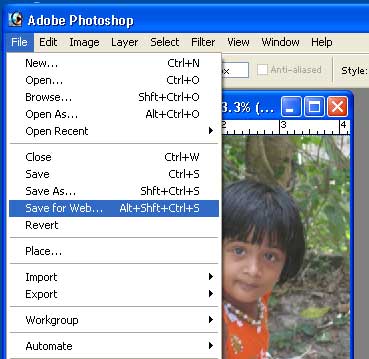
The Save for Web Window appears on the screen
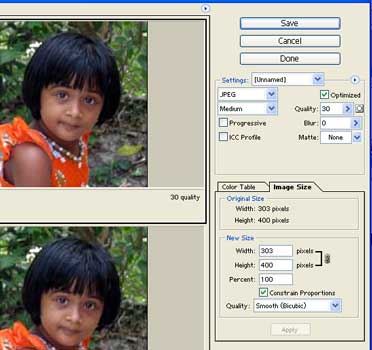
Now you can cofigure the properties from Settings window
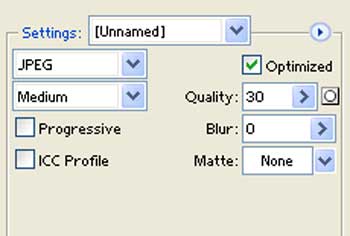
- Since it's a photograph, choose JPEG.
- You can check the option Progressive if you like, it's only difference is how the loading will look like.
[Progressive images first appear blurry, and then become clearer as the image loads. Non-progressive images load line-by-line.] - First choose quality level, High, Medium or Low according to the quality of the picture. (To have more control over the quality, use the slider or enter number in the field Quality)
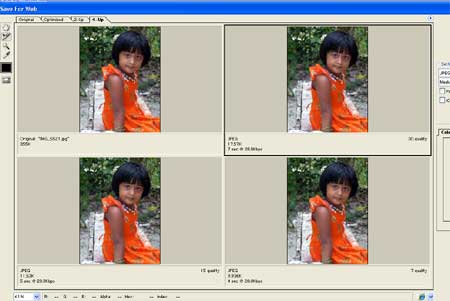
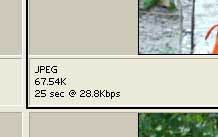
Look at the file size and estimated loading time displayed in the lower-left corner while adjusting settings. At the same time, look at the image to decide on what quality looks good enough.
Adjust the quality slider to get a desired file size with quality. For background images, make sure file sizes fewer than 5KB, for header images up to 40 KB and for Photos displayed on the page are up to 50KB are reasonable, depending on dimensions.
Once you are satisfied with your photo on the right, click the "Save" button. The "Save Optimized As" window will open. Type a file name, browse to the desired folder on your computer and click "Save."
A Technical blog for Website Owner's
Categories
- Browsers (5)
- Domain (4)
- Email (7)
- Hosting (3)
- Internet (1)
- Localhost (18)
- Miscellaneous (2)
- Offers (2)
- Web Design (4)